|
::
Removing a rear quarter ::
|
|
|
Rusty wheel arches? Side bumper bracket missing? Sadly you might need this guide prior to taking your 155 to a bodyshop for some welding to the rear arches! There are over fifty pictures so the aditional links below may help you to navigate more easily. If you have any queries about this technical article or wish to submit your own article please email technical@alfa155.co.uk |
|---|
Rear Lights | Trim | Rear Seats
| Parcel Shelf | C-pillar Trim |
Screw Covers | Bumper | Wing
Bolts | Sealant | Removal
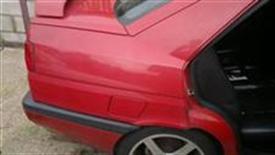 |
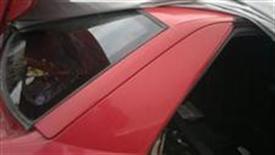
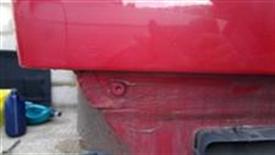
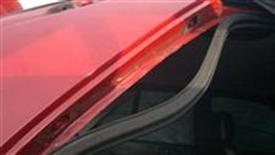
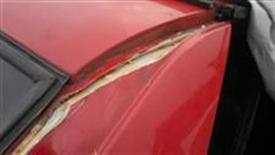
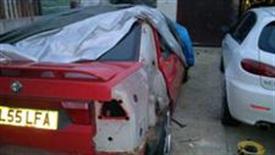
Looks
good from a distance...
|
|
|---|---|---|
|
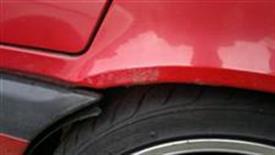
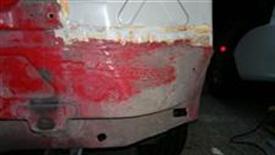
...but up close, the problem bubbles are more visible. Wheelarch bubbles on a 155 usually mean major trouble underneath too. You might also notice the bumper is not aligned properly...this is because the side bumper mount has rotted out! |
 |
|
|
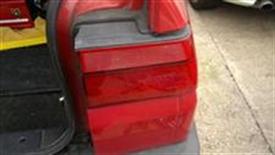
Removing
the rear light ^
|
||
|
Start by removing the rear
light.
|
 |
|
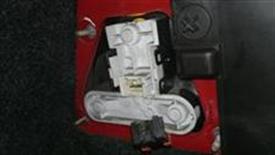 |
Remove the plastic thumbscrews and the plastic cover. Then remove the four nuts and disconnect the wiring plug. Slide the light unit away from the car. |
|
|
Removing
the interior trim ^
|
||
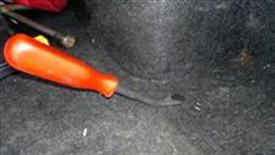 |
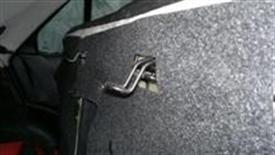
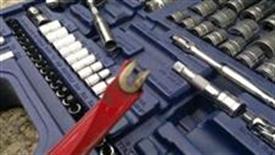
Remove the carpet to see
the boot floor, a trim removal tool is a real help with the plastic
fasteners.
Remove the upper boot lining too. |
|
|
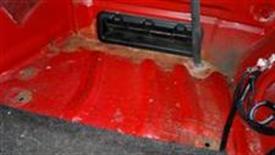
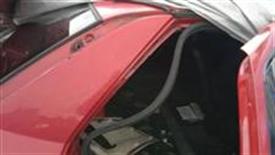
Corrosion can be seen near
the air vent, so in this case the boot floor is likely to need some
work too.
|
 |
|
|
Removing
the rear seats ^
|
||
 |
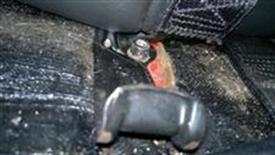
The seat squab is held in
place by two allen bolts underneath. Once they are removed, push the
squab rearwards and up at the same time, to release from the clips shown
below.
|
|
|
These clips retain the squab and also fasten the base of the seat backs. Remove the two allen bolts holding the clips in place. |
 |
|
 |
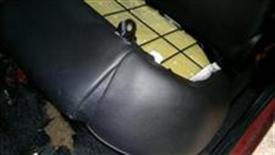
To remove the seat back
completely you need to pull out the bottom whilst pressing on the top
to release the brackets shown in the picture...it will probably take
a few attempts!
|
|
|
Removing
the parcel shelf ^
|
||
 |
Remove the plastic fasteners
now revealed on the rear parcel shelf.
|
|
|
Undo the single bolt on the roof of the boot. Yes I know the parcel shelf is missing in this picture, I forgot to remove the bolt and broke it's bracket off the parcel shelf! |
 |
|
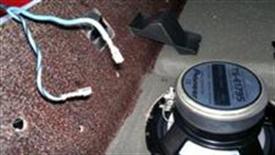 |
Don't forget to unclip the speakers before removing the parcel shelf completely. |
|
|
Removing
the C-pillar cover ^
|
||
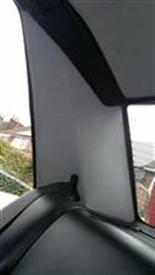 |
Now for the C-pillar trim.
|
|
|
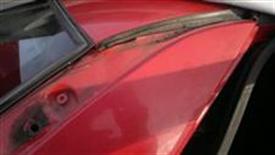
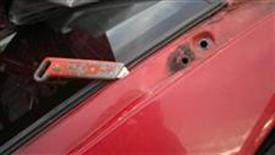
Remove the screw near the
rear window.
|
 |
|
 |
Then the screw which goes
through the plastic trim and C-pillar trim.
|
|
|
Gently
prise away the C-pillar trim, use the trim removal tool if possible
because the clips are fragile.
|
 |
|
 |
Now the interior trim is
off...
|
|
|
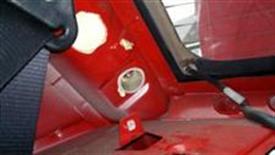
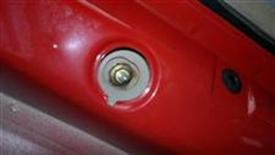
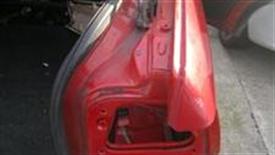
You can see the two nuts
securing the cover piece, remove them both.
|
 |
|
 |
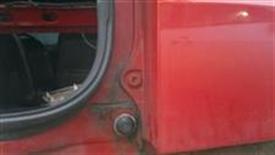
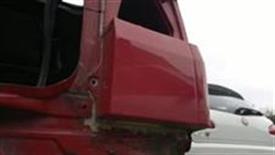
Go to the outside of the car and gently prise off the cover. Start at the bottom and lift it, once the captive bolts are free of the bodywork slide the cover towards the rear of the car. |
|
|
This is necessary to avoid
breaking the end piece on the locating stud.
|
 |
|
 |
While you're there, remove
the door seal, it'll only be in the way when you get round to cutting
the sealant.
|
|
|
Removing
the plastic screw covers ^
|
||
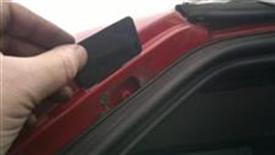 |
Gently prise of the plastic
cover after cutting underneath it with a sharp knife. Failure to do
this will result in a broken cover as they are very thin.
|
|
|
The odd shaped one will
just pop out.
|
 |
|
|
Removing
the bumper ^
|
||
 |
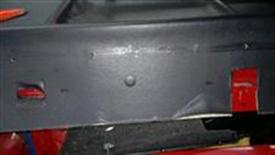
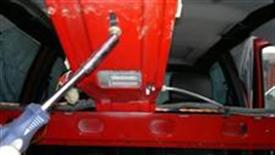
Remove the two bolts by
the boot opening.
|
|
|
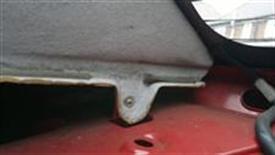
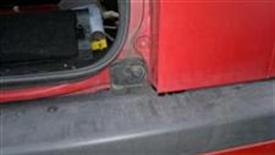
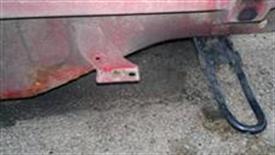
From underneath, remove
the securing bolts which attach to the bracket shown.
|
 |
|
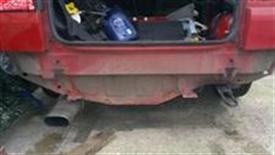 |
Slide the bumper off by
pulling towards the rear of the car to clear the side mounts.
|
|
|
Removing
the fixing bolts ^
|
||
 |
Now you can access all the allen bolts and screws which mechanically hold the quarter in place. 1. Near the top of the windscreen |
|
|
2&3. Near the bottom
of the screen.
|
 |
|
 |
4. Towards the rear of the wing 5. Top of the rear light area. |
|
|
6. Bottom of the rear light
area.
|
 |
|
 |
7. Rear of the car, under
the quarter.
|
|
|
8. Under the quarter, behind
the wheel.
|
 |
|
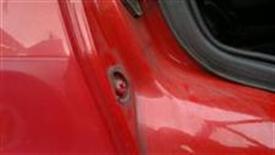 |
9. Slotted screw near the
door catch.
|
|
|
10&11. Slotted screws
on the C-pillar.
|
 |
|
 |
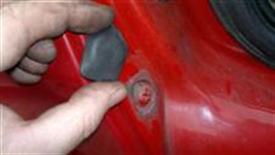
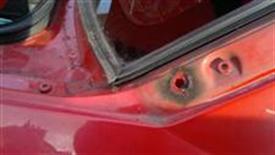
Nothing
ever goes as it should. One of the captive bolts sheared immediately
and had to be "persuaded" out by wiggling it around.
|
|
|
Thankfully
the reverse of this one is accessible so a nut will be used on refitting.
|
 |
|
 |
This allen bolt didn't need persuading, it simply fell off, with the surrounding rust |
|
|
Removing the sealant ^ |
||
 |
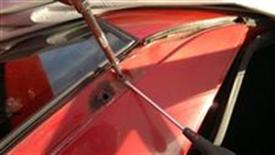
Now
the tedious part...you'll need a sharp knife and patience. Some
people suggest a hot knife assists with removal but I found it ok just
to cut from various angles to remove the sealant.
|
|
|
I
started from the top and worked round, removing as much as possible,
until the quarter could be seen to move.
|
|
|
 |
Around the light area. |
|
|
Below
the rear.
|
 |
|
 |
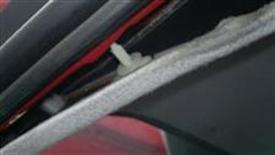
Underneath the quarter. Note: it's the lowest line you can see. |
|
|
Finally the door shut.
|
 |
|
|
Removing
the panel ^
|
||
 |
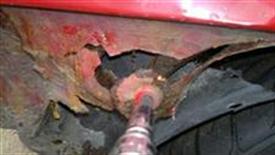
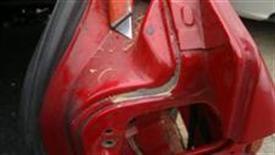
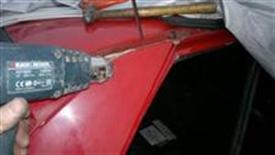
This is the problem area, there's lots of sealant and expanding foam holding this in place. I cut away as much as possible but then resorted to... |
|
|
...a hot air gun. This softened
what was left and allowed me to pull off the panel.
|
 |
|
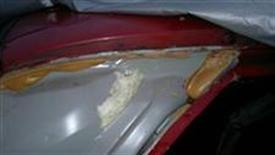 |
That big lump of sealant
on the right was the problem, it's not very accessible.
|
|
|
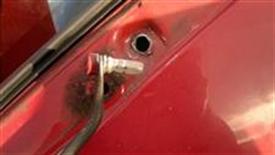
Final bit of removal is the fuel filler neck. There's a recess about 10mm inside the filler neck, inside this recess is a metal ring which must be removed before the rubber will compress enough to go through the hole in the quarter. |
 |
|
 |
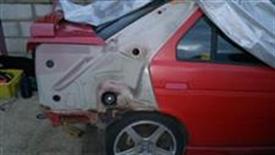
Quarter removed to reveal
a naked back side!
|
|
|
Rear doesn't look bad at
all.
|
 |
|
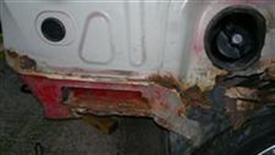 |
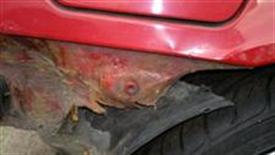
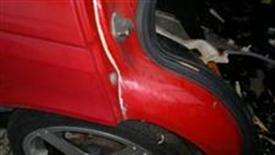
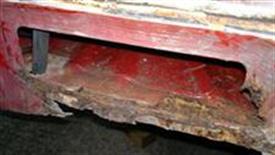
But the side is a mess!
|
|
|
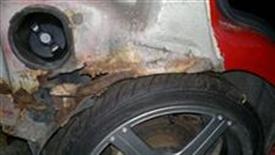
Oh dear!
|
 |
|
 |
The floor will need some
work too :(
|
|
|
|
||
